|
Download Members: $0.00 Non‑Members: $75.00 |
Buy Now |
Publication Details
| Published Date: | |
|---|---|
| Citation: | Troy Michaels, Boeing Canada, CAMS Specialist |
Abstract
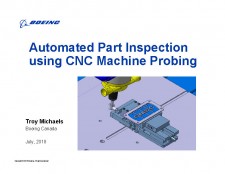
The purpose of this technical paper and presentation is to share the steps required to utilize a 5-Axis CNC machine into an automated CMM. There is a limited amount of published information on the subject and both a presentation and a white paper on the subject will help the industry understand the capabilities and benefits of using a CNC machine as an inspection tool. The presentation and white paper would contain details on the following information:
Benefits of using a CNC machine as a CMM:
- Determine process capability issues before they become a problem.
- Allow complex parts to be machined accurately using CNC machine probing during the machining process.
- Infrastructure to monitor health of a CNC machine.
- Reduced product flow time.
- Increase the accuracy of a CNC machine through scheduled calibrations.
CNC machine probe infrastructure:
- Integration of inspection software and hardware to a CNC machine.
- Choosing the right machine probe for your application:
- Straight probe.
- Modular probe for right angle and hard to reach applications.
- Reference monuments in the CNC envelope for routine health checks.
- Probe tip calibration monuments.
CNC machine calibration:
- Determining the machine calibration accuracy requirements.
- Evaluating and compensating the 21 machine errors that effect the accuracy of a CNC machine.
- There are three different calibration compensation methods for CNC machines equipped with a Siemens 840d control and each one has a specific use and application: ENC, CEC, and VSC.
- Choosing the correct laser calibration hardware and compensation method for different applications: Keysight 5530 Laser interferometer, laser tracker, Etalon LaserTracer-NG.
- Using all the tools in your tool box: Using data from both a laser tracker and laser calibration system to get the job done.
- Volumetric machine error calculations using AMSE B5.54 Standard.
- The frequency of machine calibration and the effects of temperature on machine calibration.
The CNC Machine probing process tasks:
- Programmer
- Creates CNC inspection programs, CNC part alignment programs, and CNC fixture alignment programs.
- Performs machine tryouts to determine if there are issues with the inspection program or the machining process.
- Formats the inspection report to represent the defined engineering.
- Machine Operator
- Enters serial number, tool number, and employee ID before the part is inspected using a bar code scanner for traceability.
- Executes an inspection program after part is machined.
- Reviews the inspection report.
Improving process quality using CNC machine probe data
- Inspection data is used to identify process deficiencies.
- Data can be migrated to a live data base to determine real time process capabilities and trends.
- The capability data can be used to justify a sampling plan for reduced inspection frequency.
In conclusion, automated part inspection using a CNC machine probe as a CMM has many benefits if implemented correctly. Some of the major benefits of implementing this process is the ability to reduce product flow times and most importantly, use the inspection data to refine the process capability of the machining process which can increased product quality.


